A form in Kycaid is a widget designed for seamless integration into your services, supporting KYC (Know Your Customer) and KYB (Know Your Business) processes, such as user identification via document uploads or video interviews.
An ID of a form (referred to as form_id in our system) is a unique identifier assigned by our system when a form is created. This ID is generated in a 36-characters UUID-like format (e.g., 18505b6f056f2143c41b97f4924dca24ea82).
If you have not created a form yet, you have to create one. Log in to the Dashboard, navigate to the Forms page, and click Create new. Enter a name for the form and click Save changes.
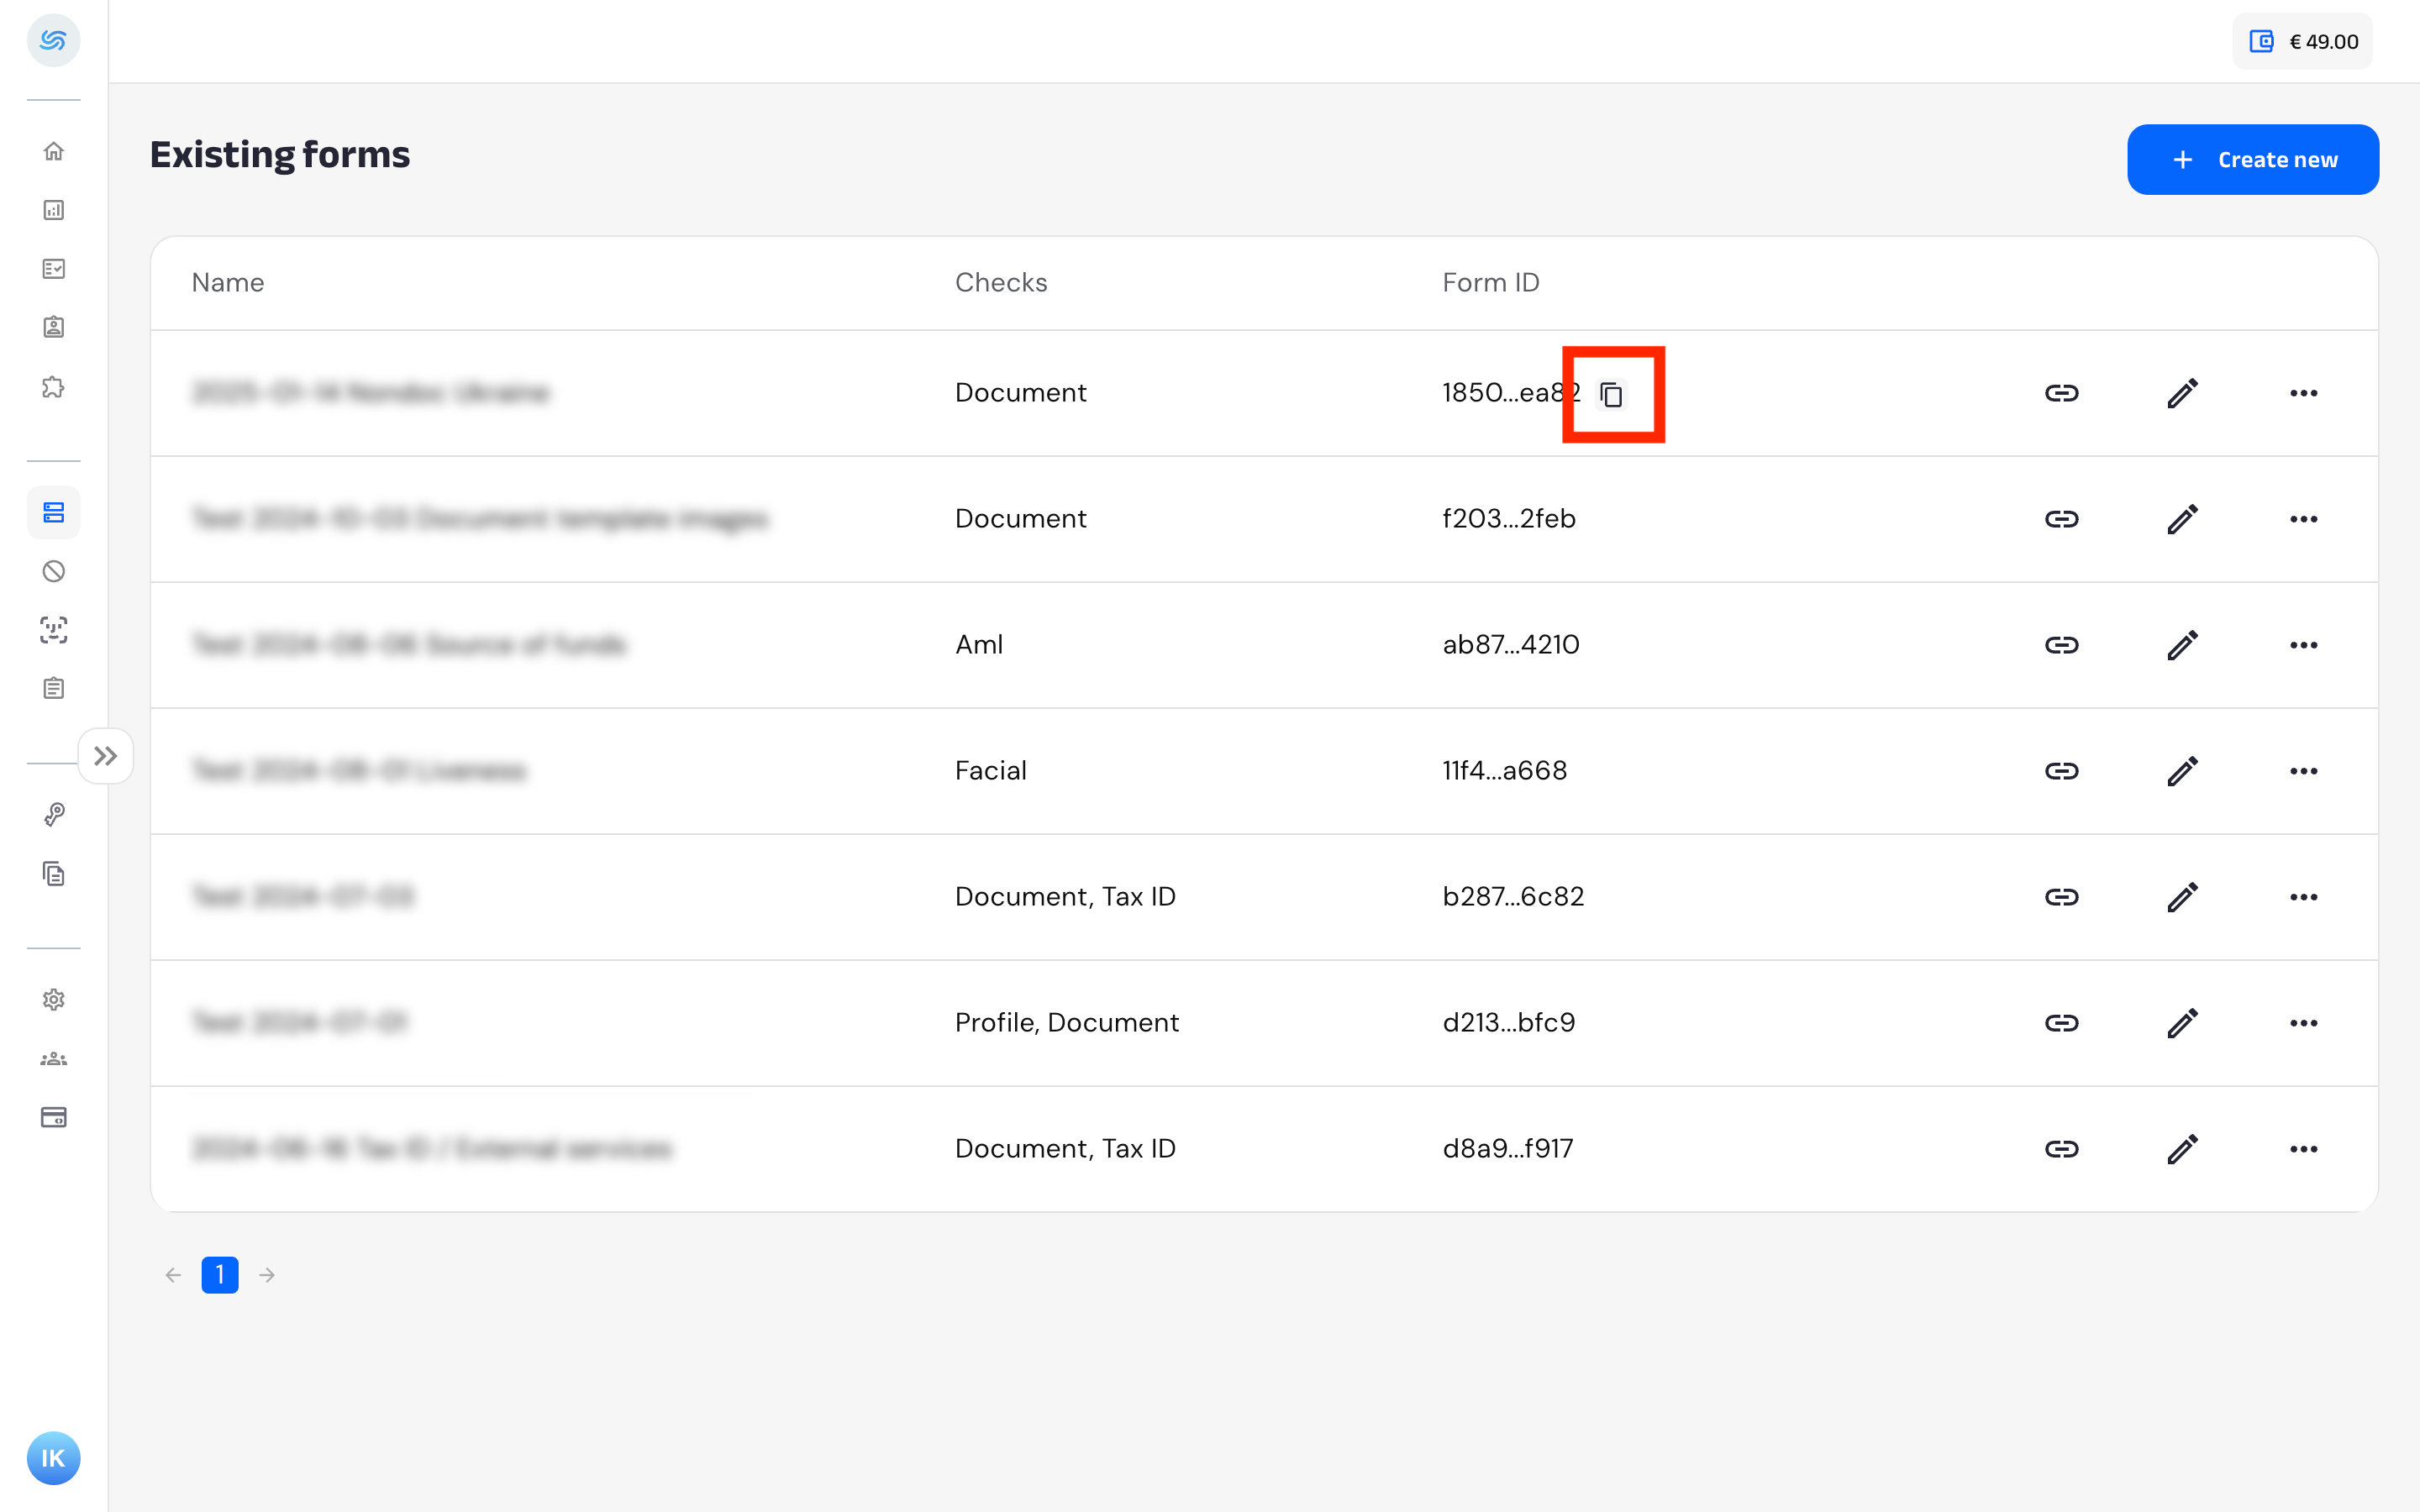
To retrieve a form_id, go to the Forms page and click Copy in the Form ID column while hovering over the target form ID:
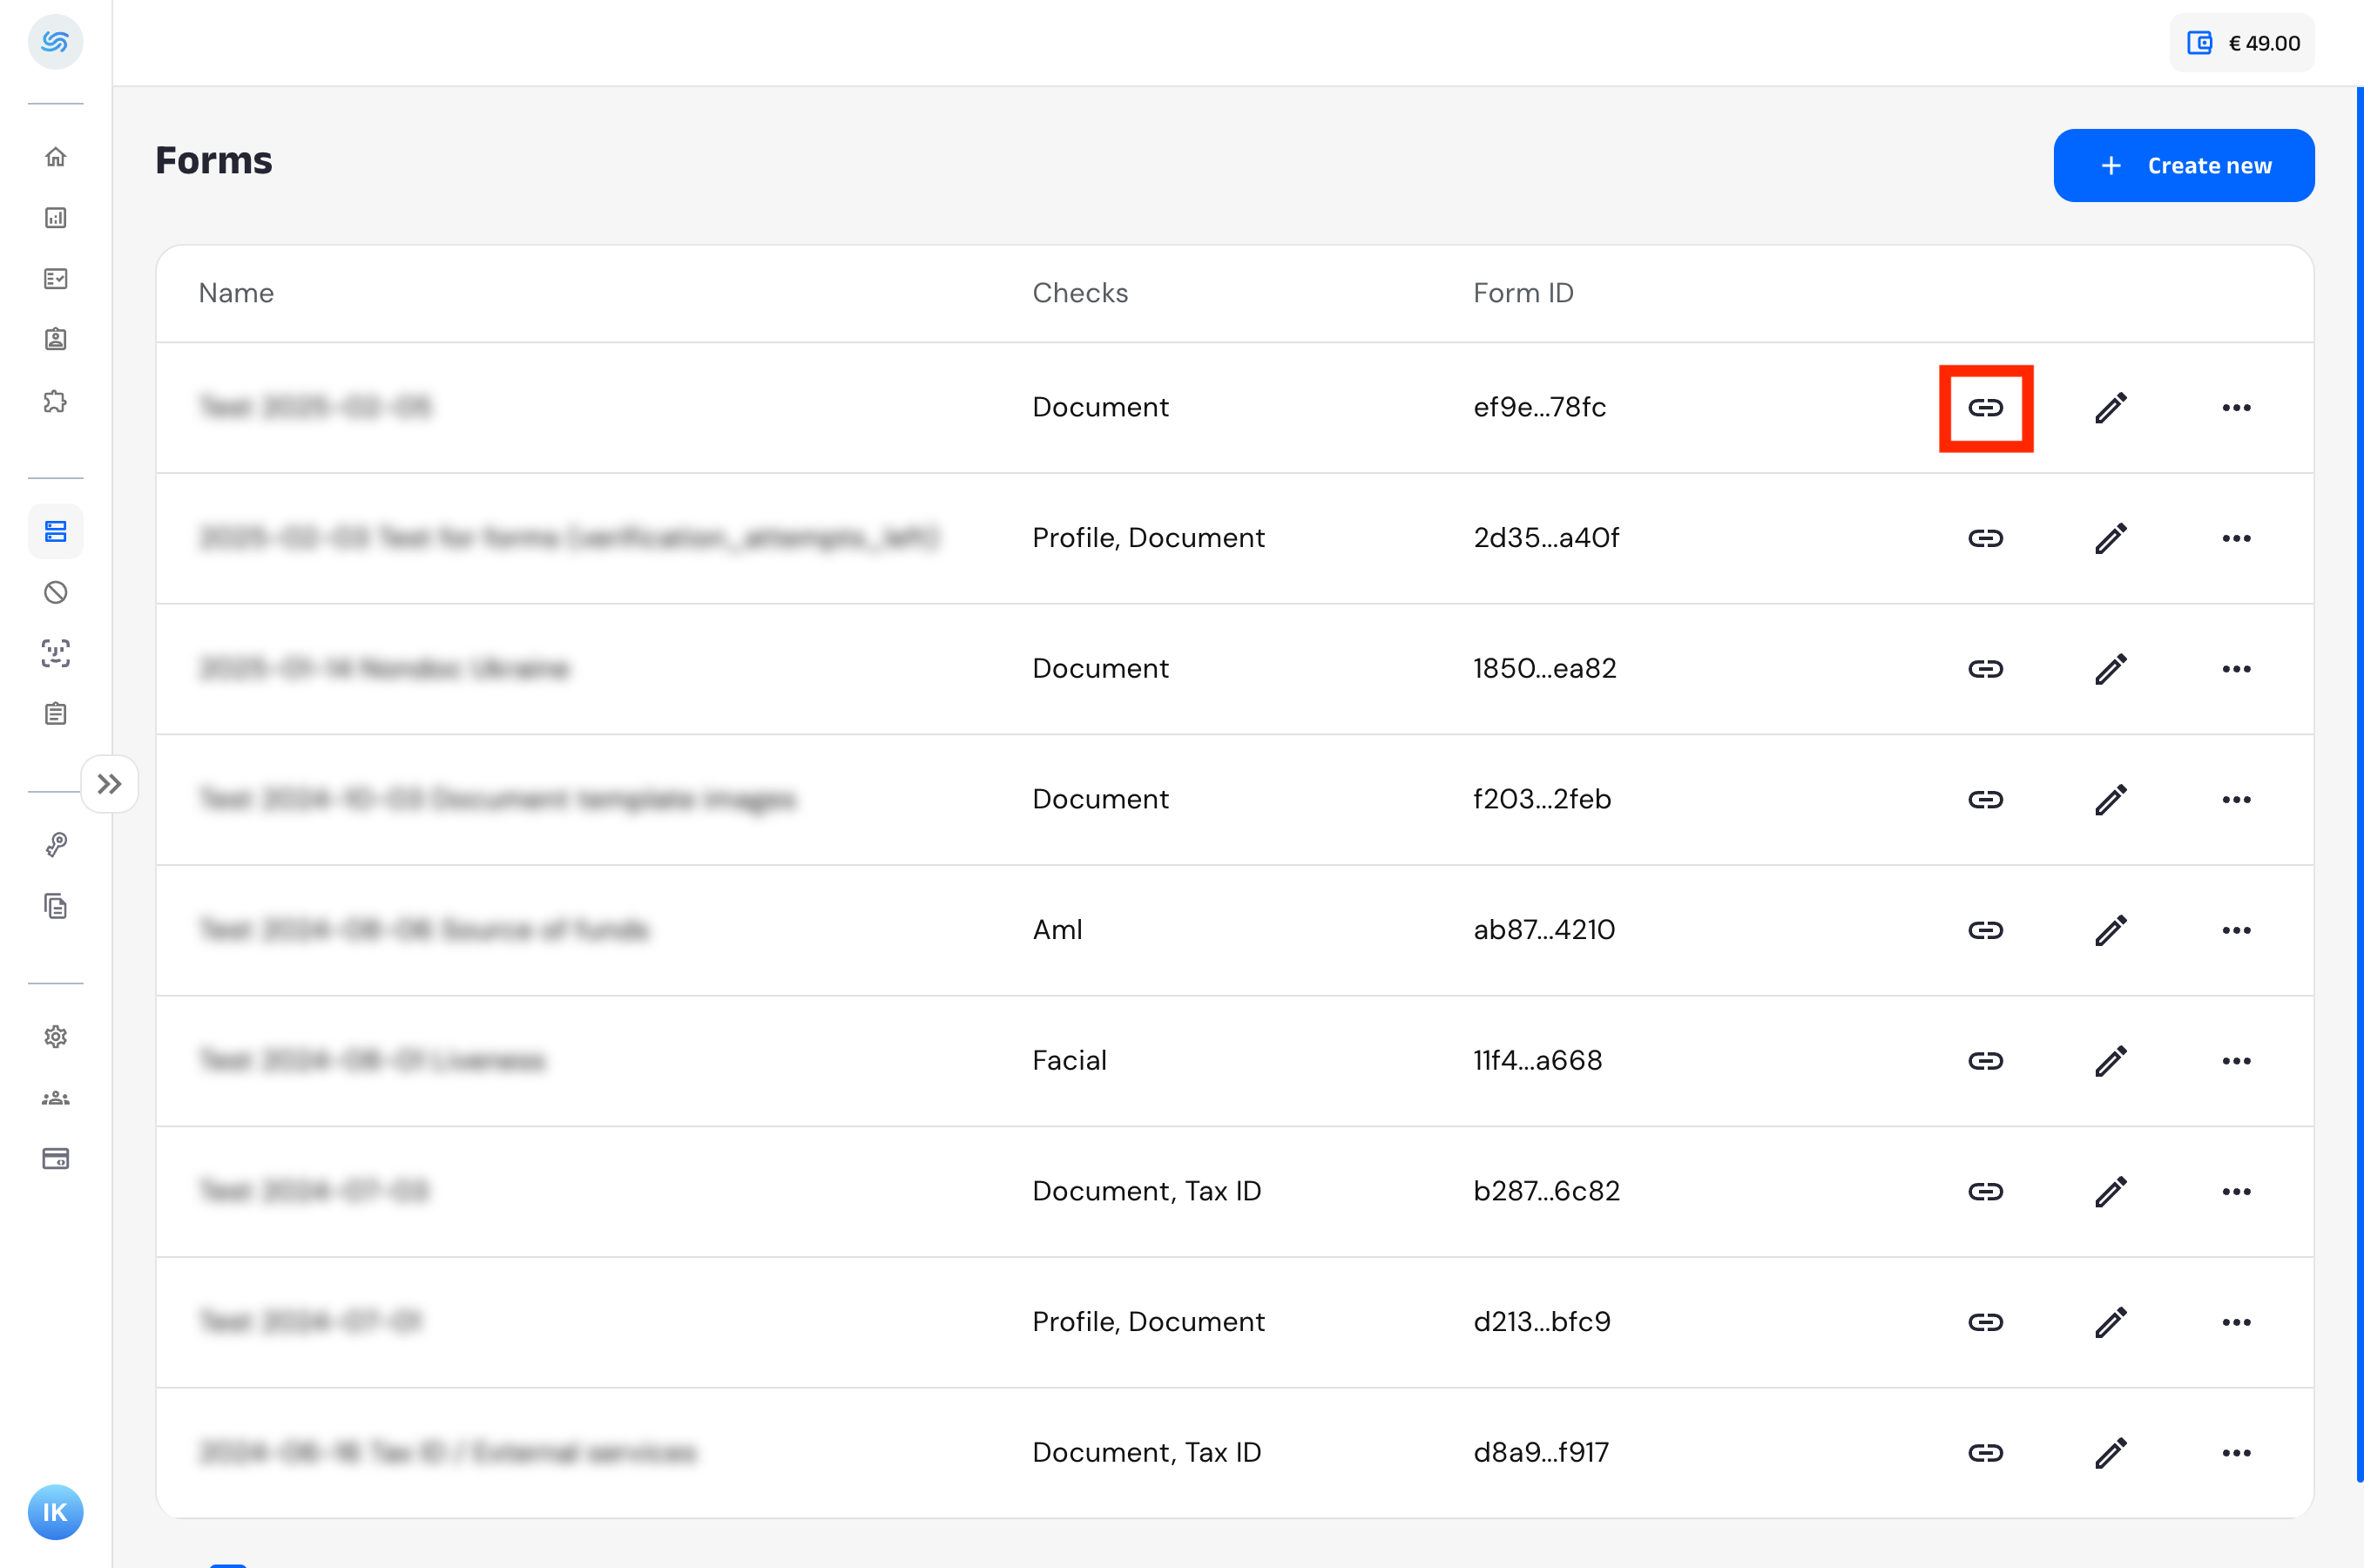
To obtain the form URL from the Dashboard, click the Link button:
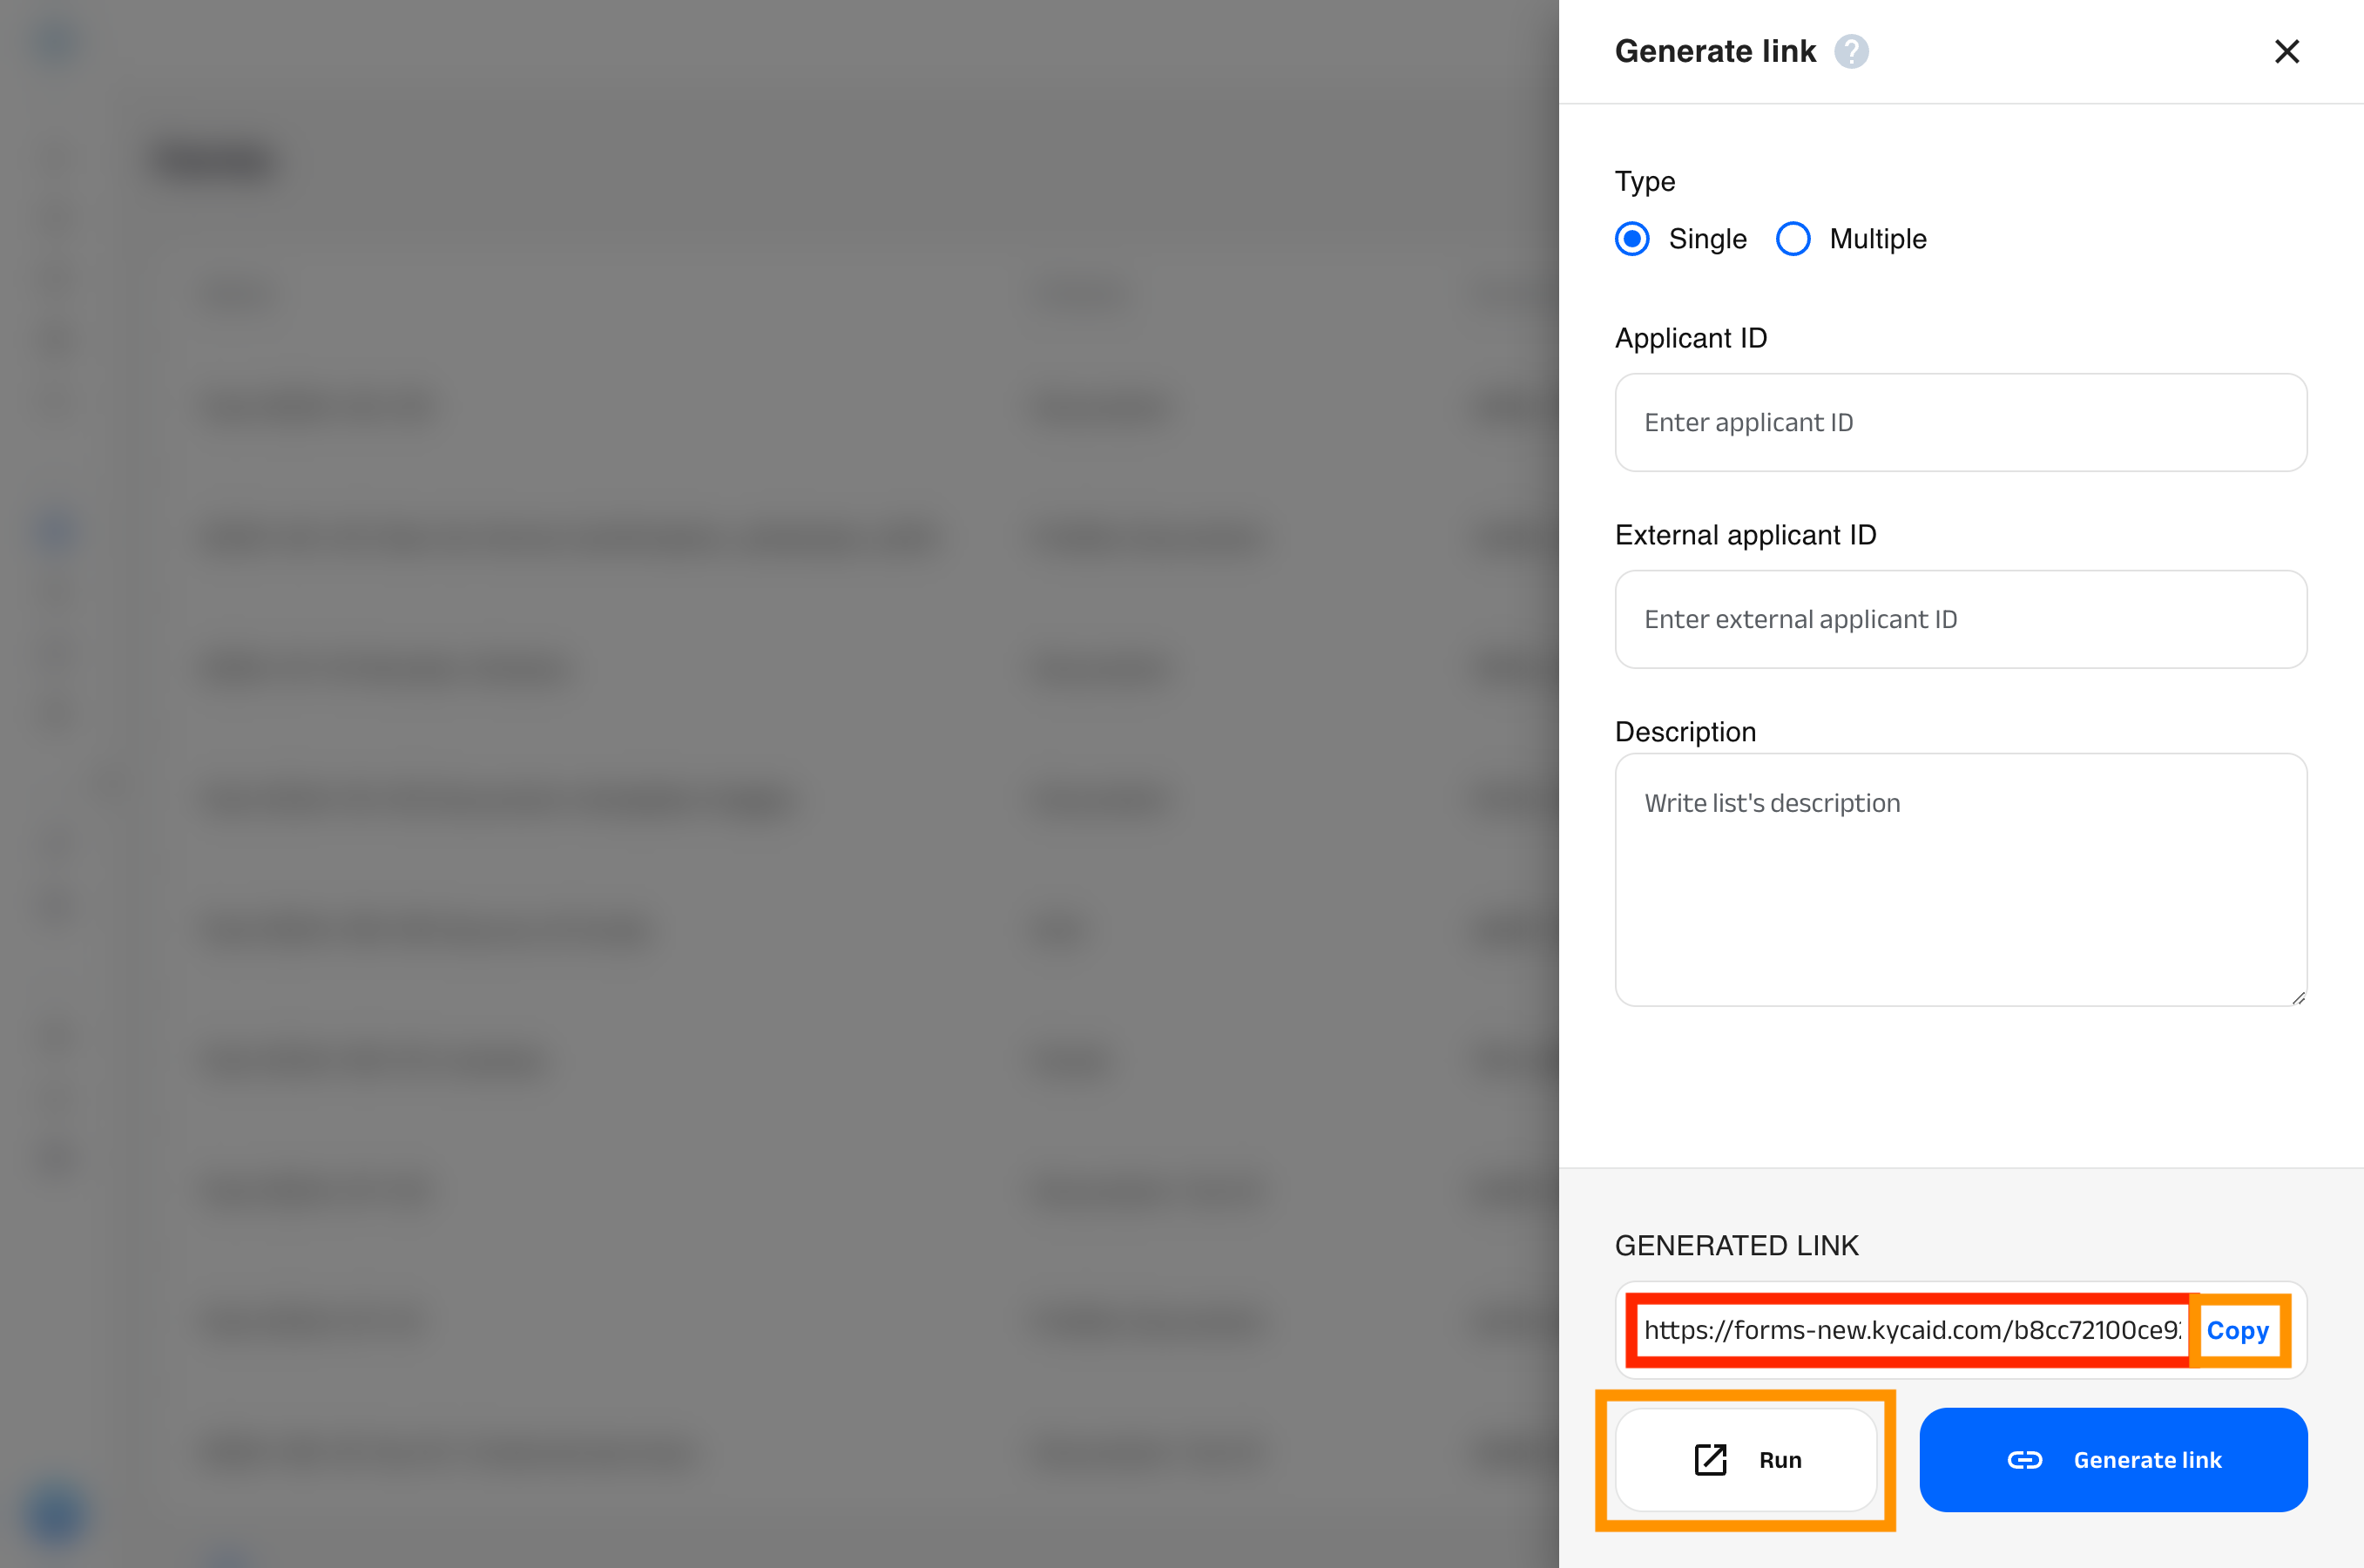
Then, click the Generate link in the modal window that appears:
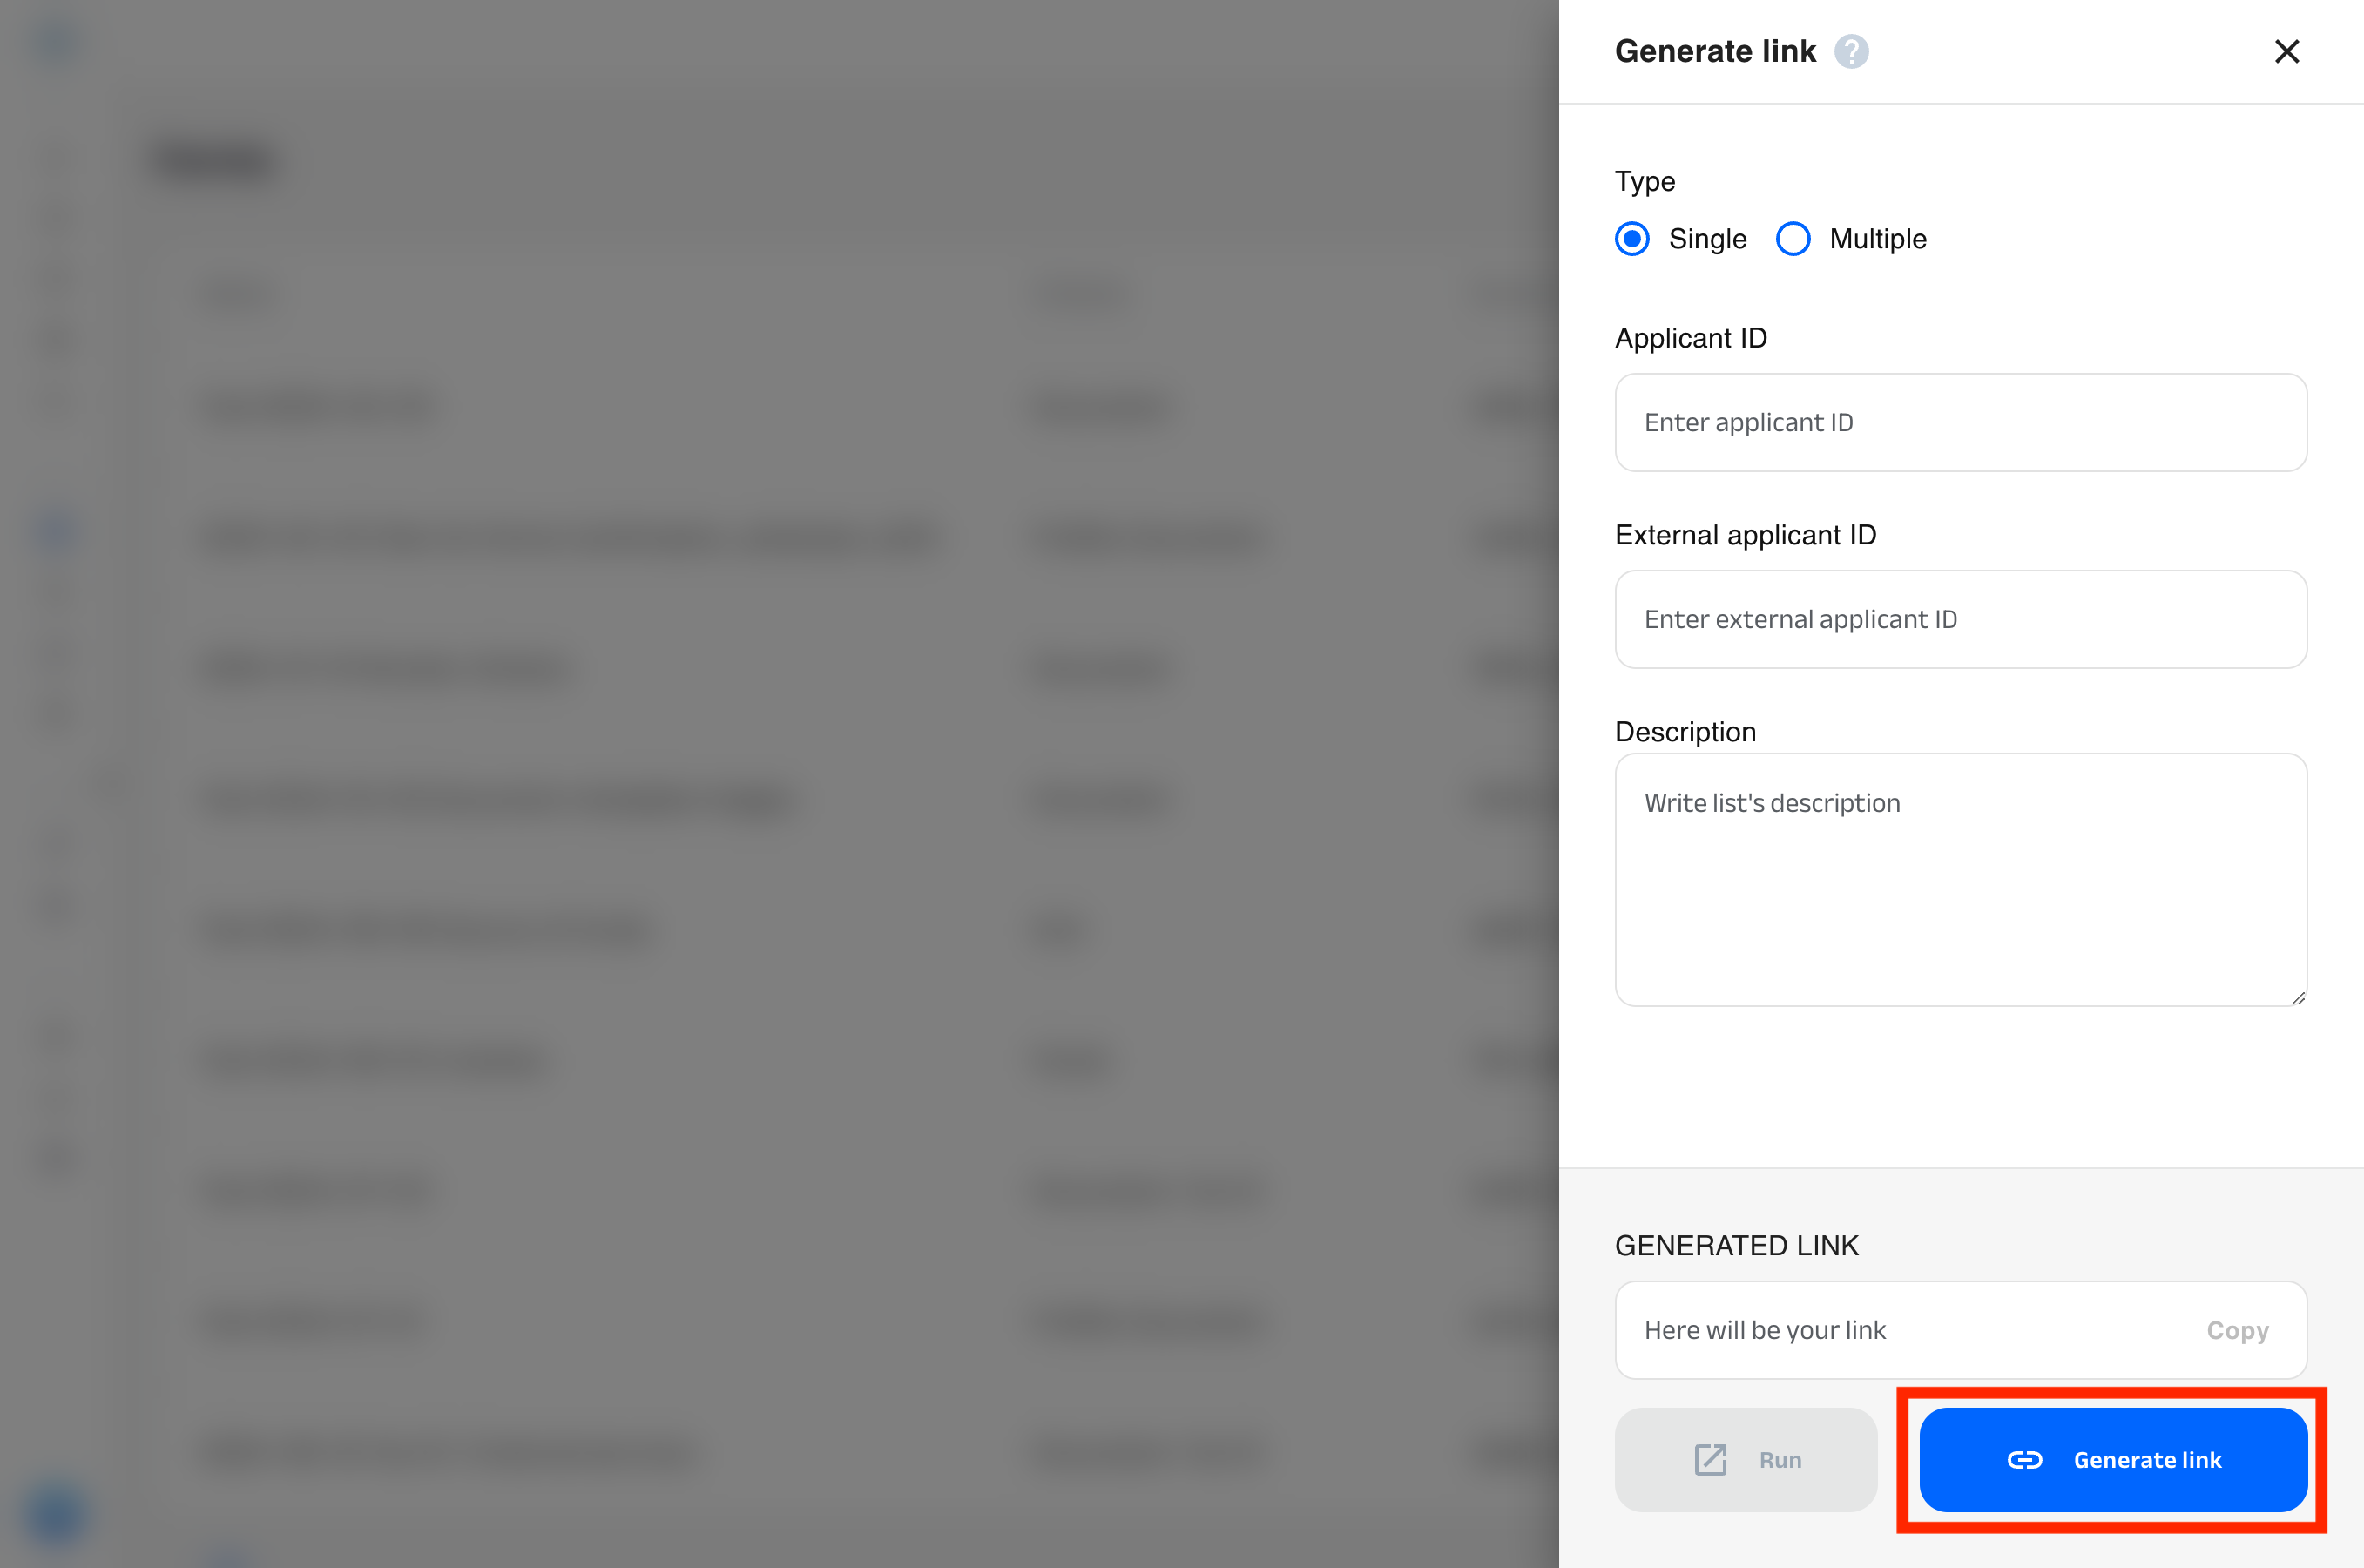
After the link is generated, you can copy it or open it in a new tab.
To retrieve a one-time URL for a form using the API, use the Retrieve form URL API request with the form_id, which you can obtain by following the instructions in the previous section.
You don’t need to create a new form for every verification. Instead, you can retrieve a unique one-time URL for each user.
If a user does not have a corresponding applicant in our system, an applicant will be created after the user completes their first form and submits it for verification. Alternatively, you can create an applicant in advance using the Create an applicant object API request.
If a user has already submitted a form and you need to provide them with another verification attempt, use the Retrieve form URL API request with applicant_id of their applicant.
If an applicant_id of an applicant was not used, a duplicate applicant will be created, potentially breaking the connection between applicants and verifications, and hindering versioning consistency.
When making the Retrieve form URL API request, you can include a user identifier from your system (e.g. user_id) with the external_applicant_id parameter. This ensures consistency across the whole user verification process and allows you to track your users at each step.
You can provide users with a form using the following methods:
- A direct URL to a form (obtained via the instructions in the previous section).
- Embedding a form in an iframe within a browser.
- Displaying the form using a native WebView on iOS or Android devices.
For the iframe and native WebView, there are additional settings available, that are listed below.
See Set up a custom domain name article for instructions on configuring a custom domain name for your forms.
For the form to display correctly on mobile screen sizes, use the following minimum container dimensions. A minimum height is required for each corresponding width.
- Width 320 px: Minimum height 700 px
- Width 375 px: Minimum height 715 px
- Width 425 px: Minimum height 775 px
- Width 500 px: Minimum height 835 px
- Width 600 px: Minimum height 950 px
- Width 700 px: Minimum height 1060 px
- Width 767 px: Minimum height 1135 px
By default, our system sets the form language based on the locale of the user’s browser. However, you can override this using the lang query parameter. In the following example:
https://forms.kycaid.com/65e5b4121d92424b9e3af5e443cca0d3b024/?lang=enthe default form language is set to English (en).
All supported languages are listed by Get languages request.
To ensure proper microphone and camera within the iframe, permissions must be granted at both the server level (via HTTP header) and the browser level (via HTML attributes):
- Server-side: your web server must include the
Permissions-Policyheader in the reponse for the page that hosts the iframe. This tells the browser that your site is authorised to share hardware access with Kycaid.
Permissions-Policy: camera=(self "https://forms.kycaid.com"), microphone=(self "https://forms.kycaid.com")- Client-side: you must also explicitly delegate these permissions to the
iframeelement using theallowattribute in your HTML code:
<iframe allow="microphone *;camera *;midi *;encrypted-media *;clipboard-read;clipboard-write;"></iframe>Our system automatically resizes iframes to adapt to the screen size of the user’s device.
When using the iframe solution, the form communicates with the parent page via cross-origin postMessage events.
The iframe sends the following messages to the parent page:
FORM_COMPLETED sent when the applicant successfully completes the form.
{
  "event": "FORM_COMPLETED",
  "applicant_id": "[...]",
  "verification_id": "[...]"
}
IFRAME_RESIZED sent whenever the content height of the form changes.
{
  "event": "IFRAME_RESIZED",
  "width": "[...]",
  "height": "[...]"
}The parent page can send the following message to the iframe:
INITIATE_IFRAME_RESIZE triggers a manual recalculation of the form content size. This should be sent once the parent page has fully loaded.
{
  "event": "INITIATE_IFRAME_RESIZE"
}Instead of handling postMessage events manually, you can use our helper script to manage iframe dimensions automatically.
- Include the script on your page:
<script src="https://forms-new.kycaid.com/scripts/iframe-resizer.min.js"></script>- Control resising using the following JavaScript commands:
- To start:
window.kycaid.iframeResizer.start('{iframe_id}') - To stop:
window.kycaid.iframeResizer.stop()
Set the allowsInlineMediaPlayback parameter to true to enable proper camera functionality.
Note that the WKWebViewConfiguration should only be used during the first initialisation of the WebView and can’t be changed afterward.
When a user submits a completed form in an iframe, the form triggers a cross-origin postMessage event:
{
  "event": "FORM_COMPLETED",
  "applicant_id": "[...]",
  "verification_id": "[...]"
}
This allows your system to handle the form completion event programmatically.
Our server provides the results of the user verification check by sending the Verification completed callback in JSON format to the URL specified in the form settings:
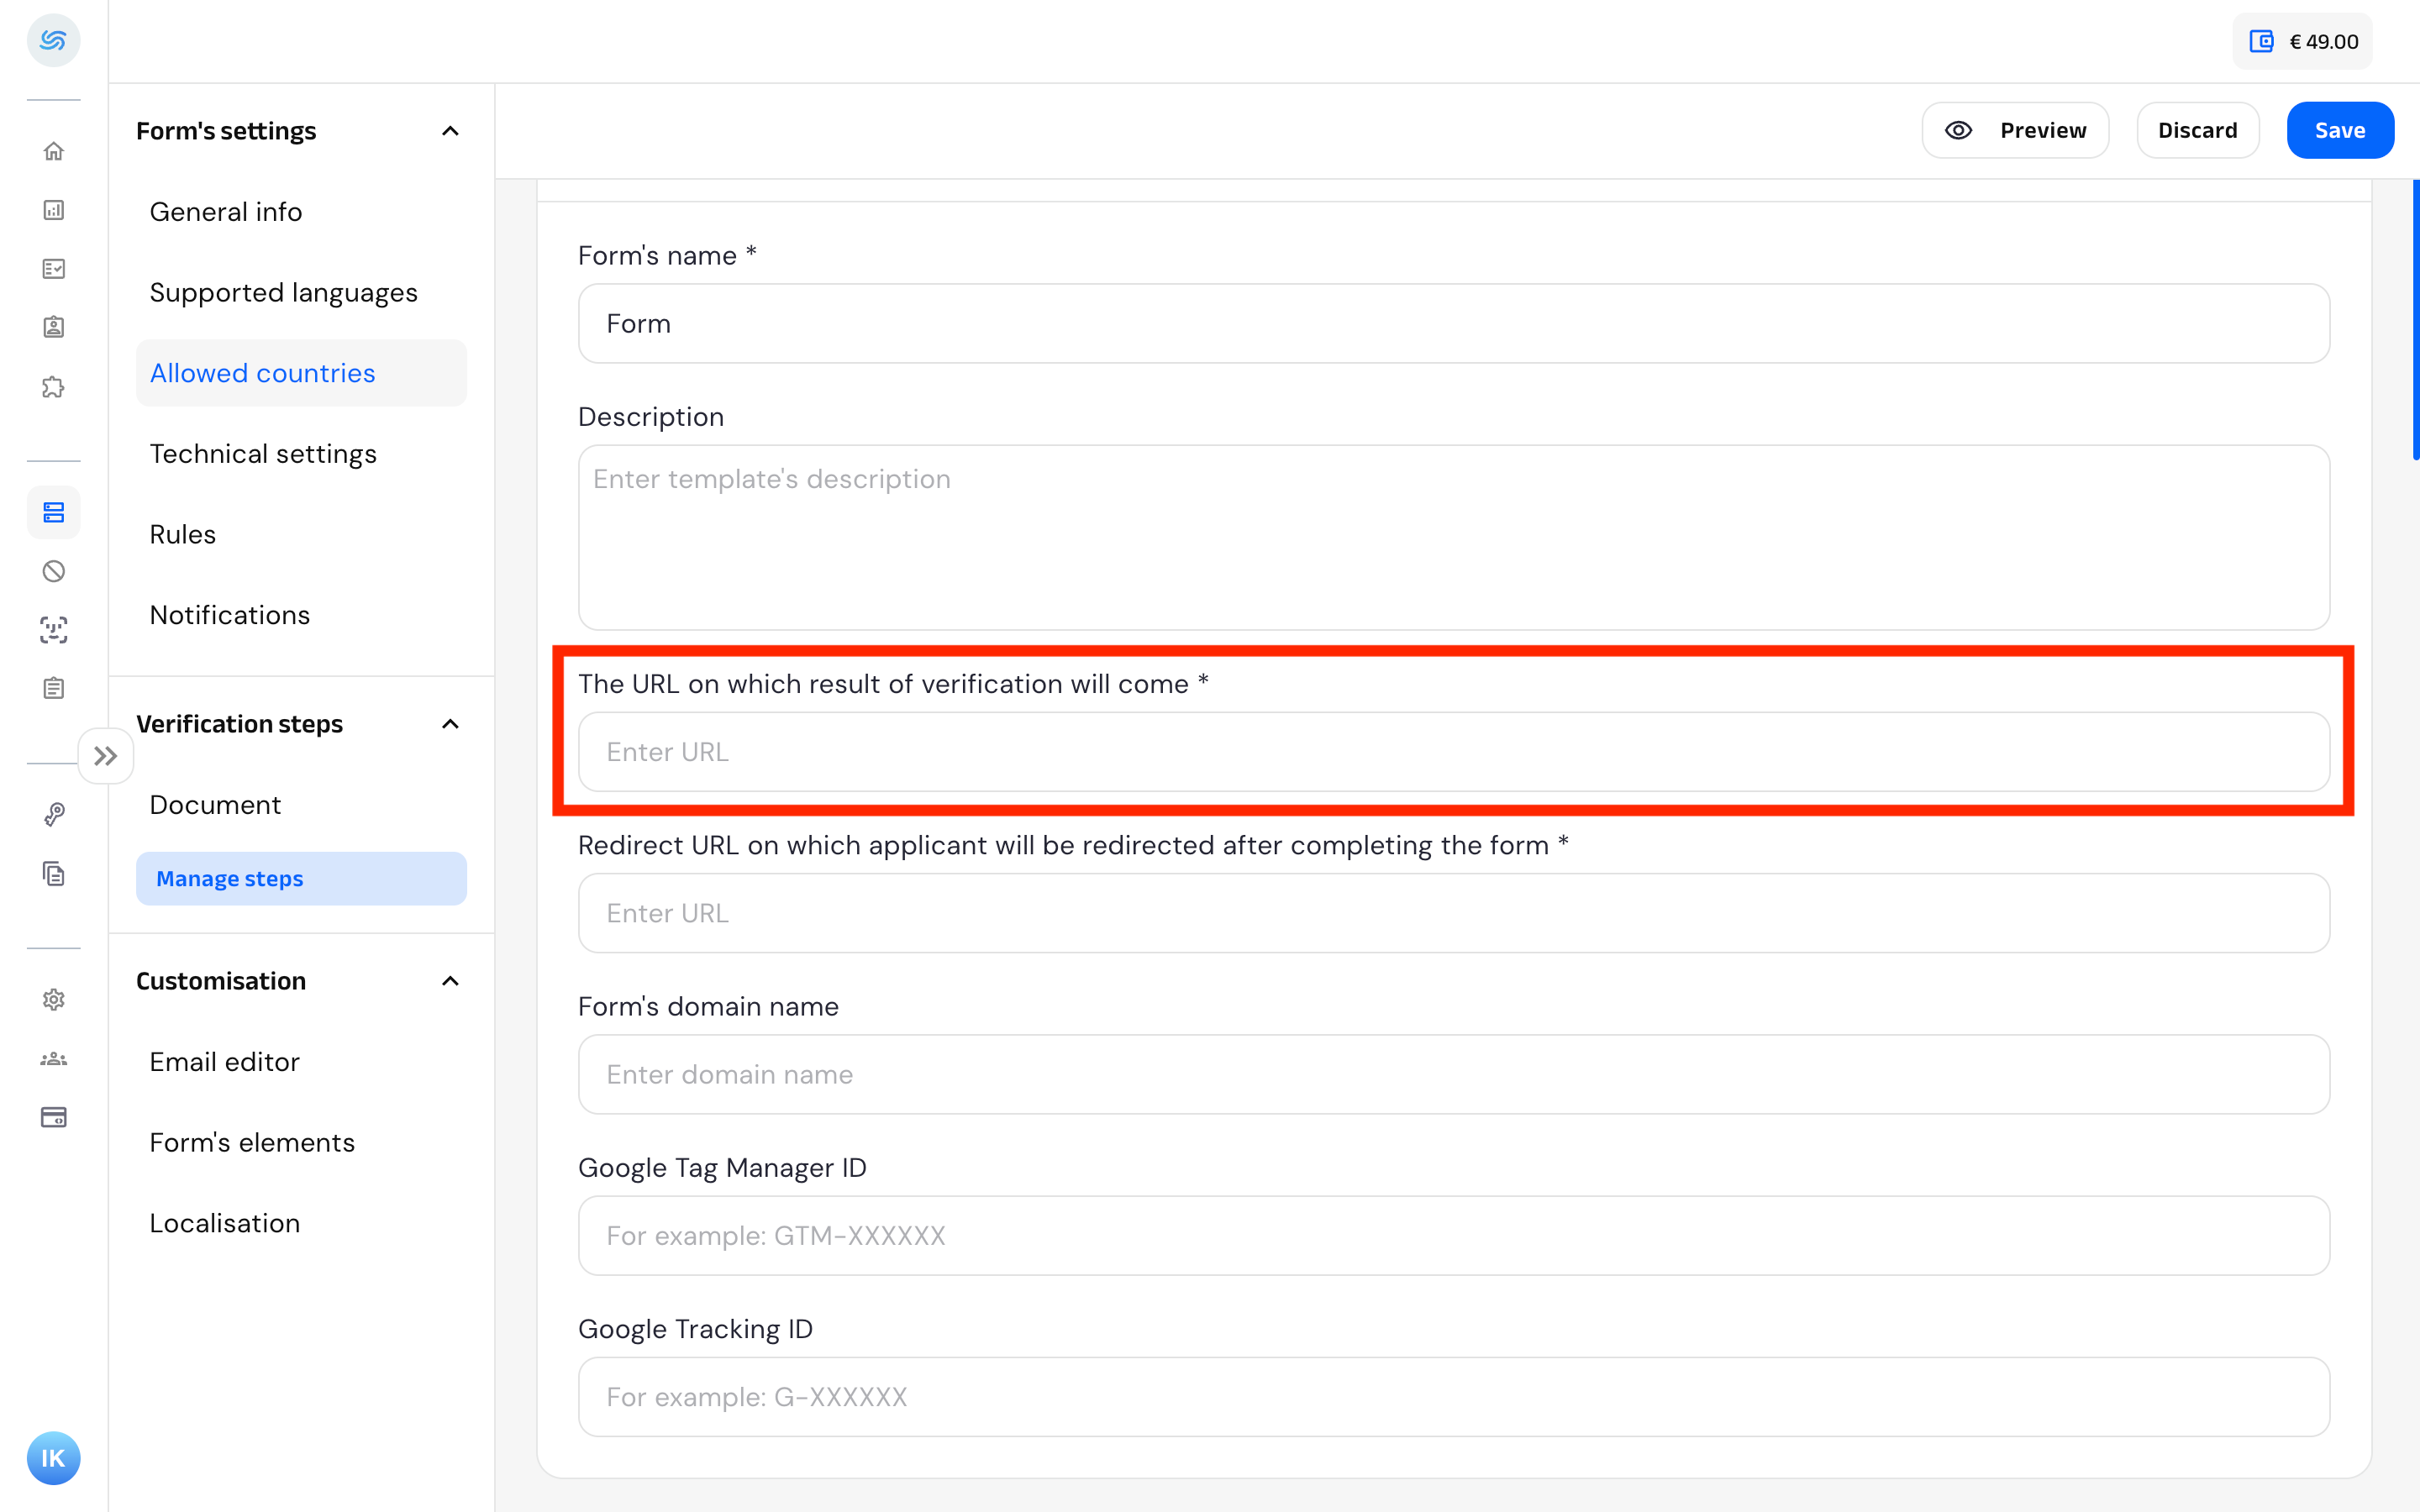
The verification process may take anywhere from 10 seconds to 15 minutes, depending on various factors. It is important to store applicant_id and verification_id from the callback for future operations related to the applicant and verification.
To additionally track when a user completes and submits a form, enable the Send the callback when verification is created option (disabled by default) in the form settings:
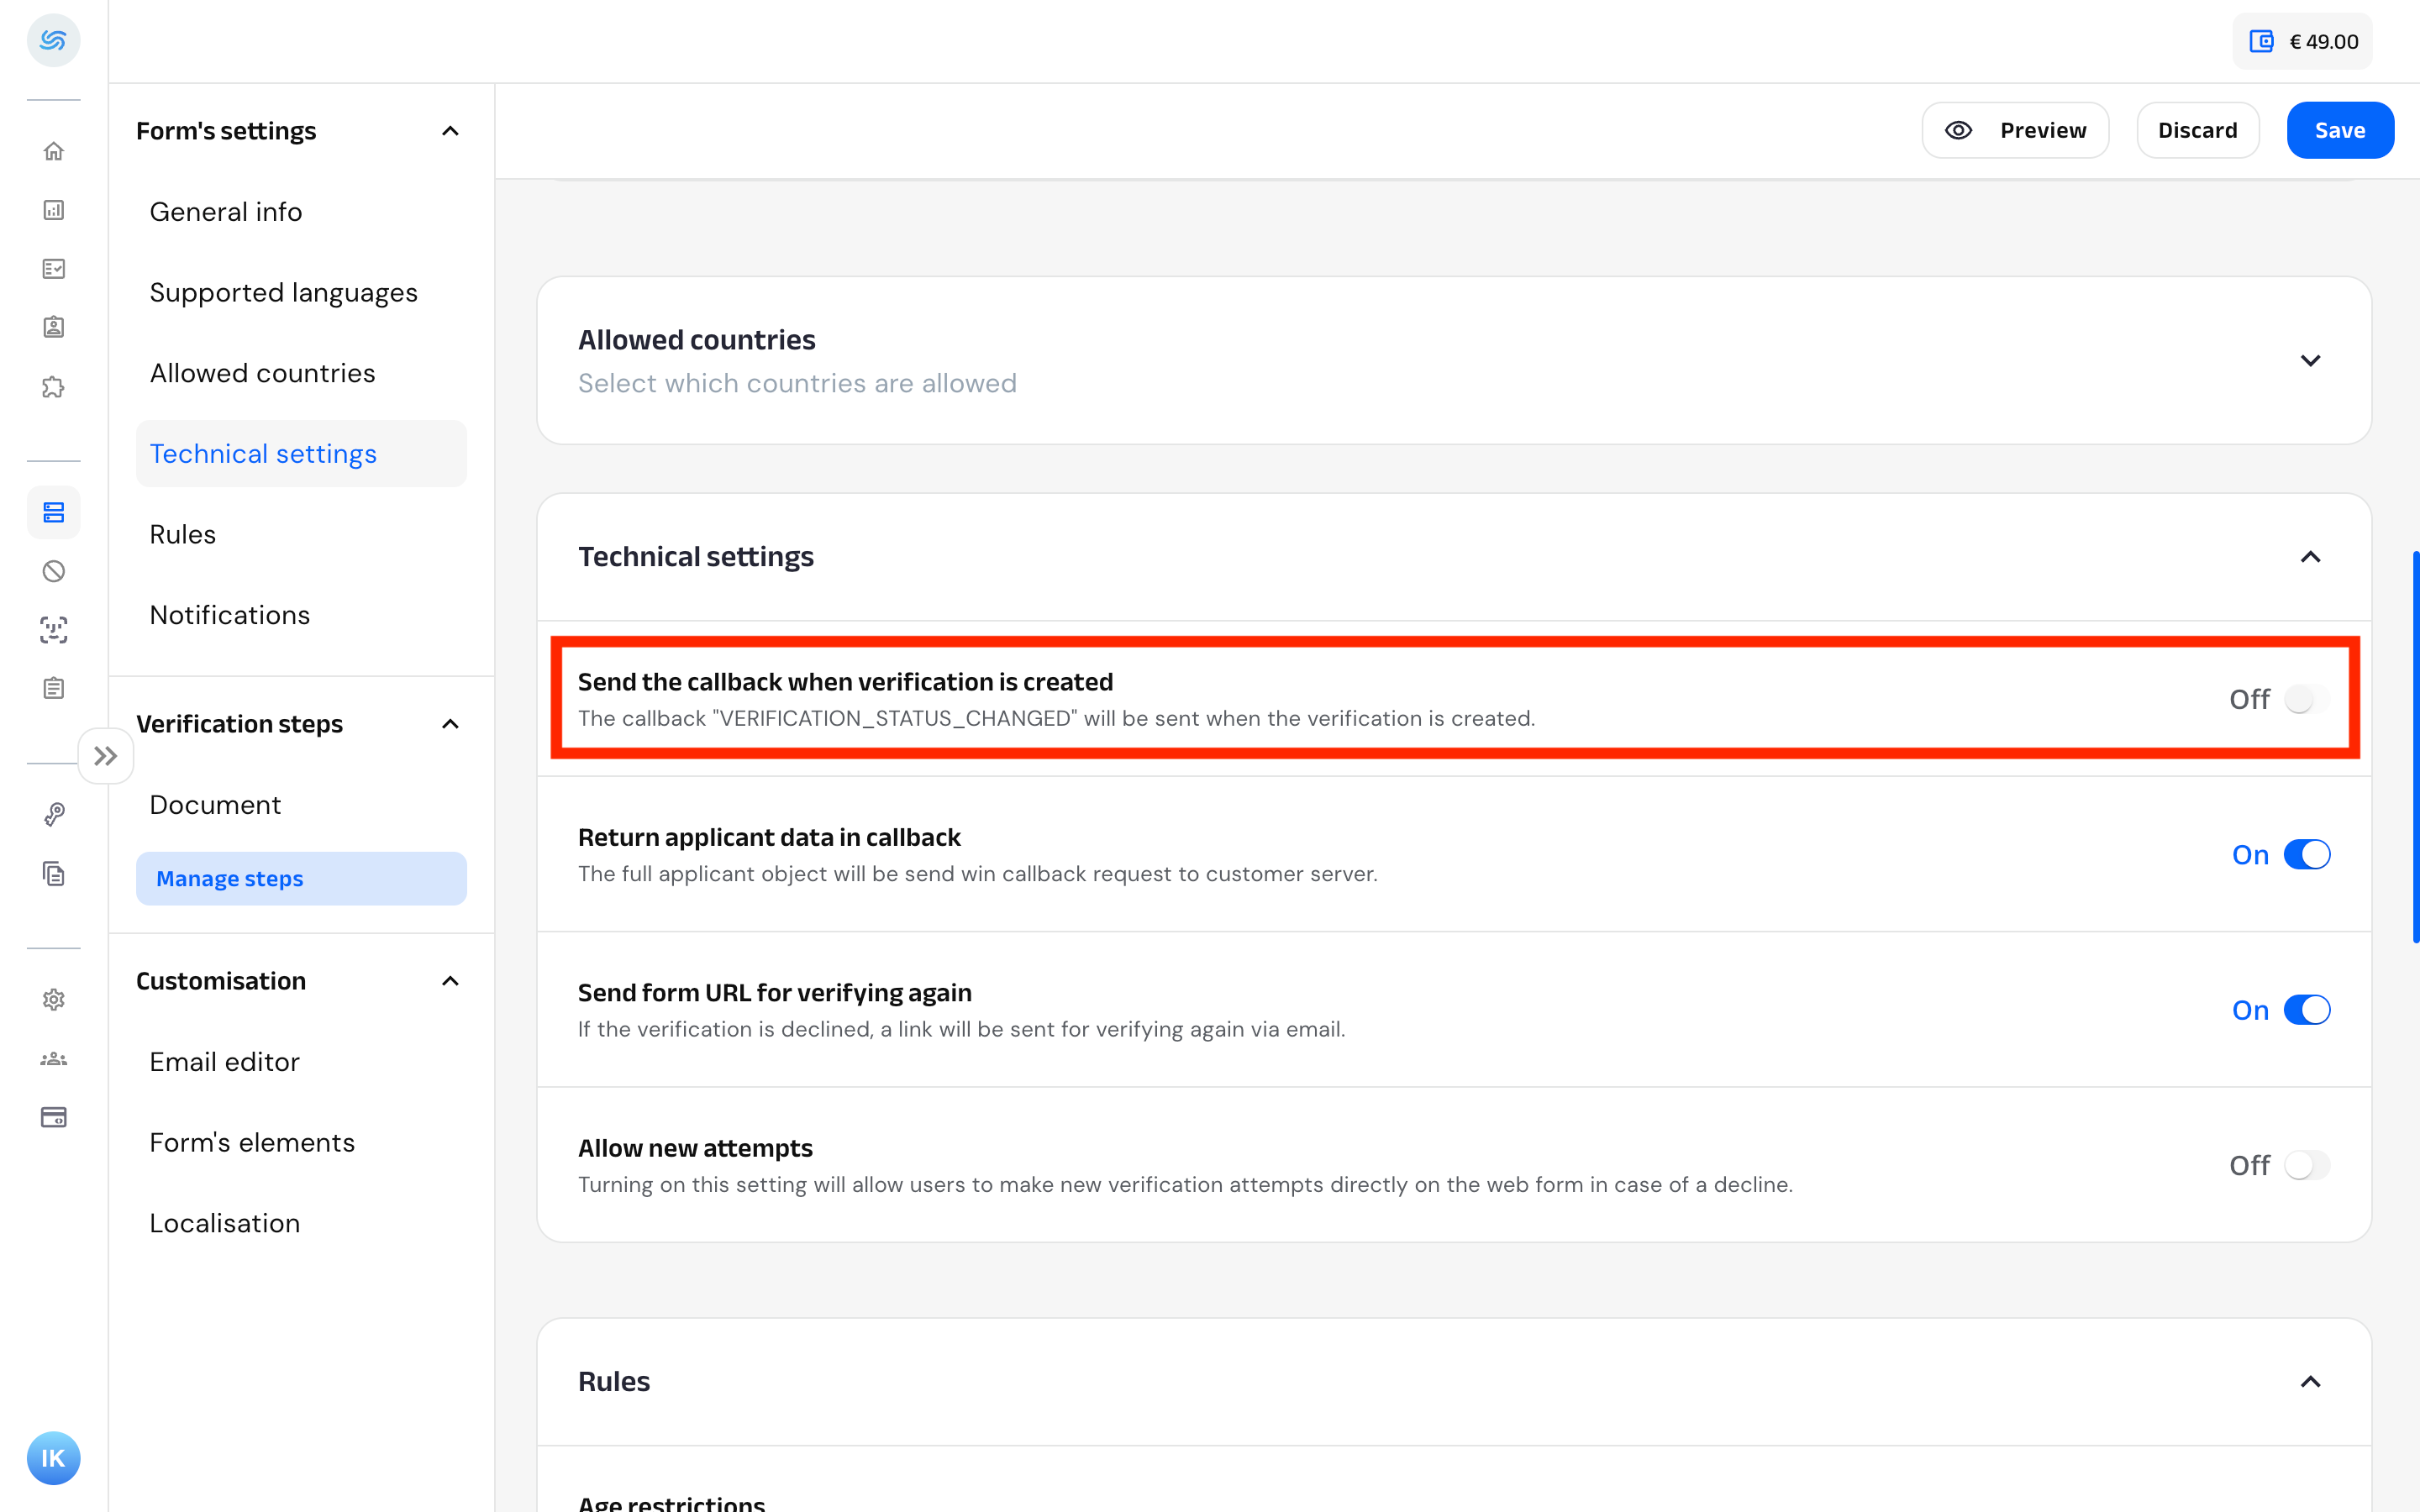
Once enabled, our server will send the Verification status changed callback in JSON format to your server (to the same URL specified in the form settings as for Verification completed callback) when a user submits a form for verification.
After sending a callback, our server waits for a 200 HTTP response (with any response body) from your server to confirm successful delivery. If your server does not respond within 10 seconds, another callback is sent 1 minute later, with subsequent retries at these intervals:
- 5 minutes
- 10 minutes
- 30 minutes
- 1 hour
- 3 hours
- 6 hours
- 12 hours
- 24 hours.
To prevent a user from restarting a form after submission, you can disable the button used to open the form upon receiving the Verification status changed callback. Optionally, re-enable it after receiving the Verification completed callback if you want the user to make another verification attempt.
You can retrieve information about the verification process by making different API requests:
- Verification with Get a verification (see
statusproperty). - Applicant with Get an applicant.
- Document with Get a document.
There are three status levels:
- The highest level is the
verifiedproperty of a verification, which defines the overall verification status. This property can be retrieved using the Get a verification API. Theverifiedproperty may have one of the following values:
null: the applicant is under verification,true: the applicant has passed verification,false: the applicant has failed verification
- A lower, more specific level is the
verifications.{verification_type}.verifiedproperty of a verification, which indicates the verification result for the specific verification type. Here,{verification_type}can be one of the following:
profiledocumentfacialaddressamlfinancialpayment_methodtax_iddatabase_screeningcompany
verifications.{verification_type}.verified can have one of the following values:
true: a verification has passed for that specific typefalse: a verification failed for the specific type
- The lowest and most specific level is the
decline_reasonsproperty of an applicant, which provides detailed reasons for a failed verification. This property can be retrieved using the Get an applicant API. Thedecline_reasonsproperty lists specific causes that led to the verification failure, offering deeper insights for troubleshooting and resolution. For a detailed list of possible reasons and their descriptions, refer to the Decline reasons article.
If a user fails the verification process and you want to allow another attempt, generate a new URL for the form (see Getting a form URL section) using the applicant_id from the Verification completed callback. This ensures that our system maintains the connection between data from multiple verifications of the user.